I wrote about making a Greenland style skin on frame kayak in July 2011. Since then, I have moved to Denmark. To save moving expense, I stripped the skin off the kayak and discarded it; then I took out the ribs and cut the frame lengthways into three pieces with diagonal cuts, numbered for rebuilding.
The original version had too small a primary stability for my style of dawdling with a camera and landing in small coves to explore. It was also much too voluminous for my small bulk, thus riding high in the water and subject to wind pressure. Here is how I revised the design with minimal effort.
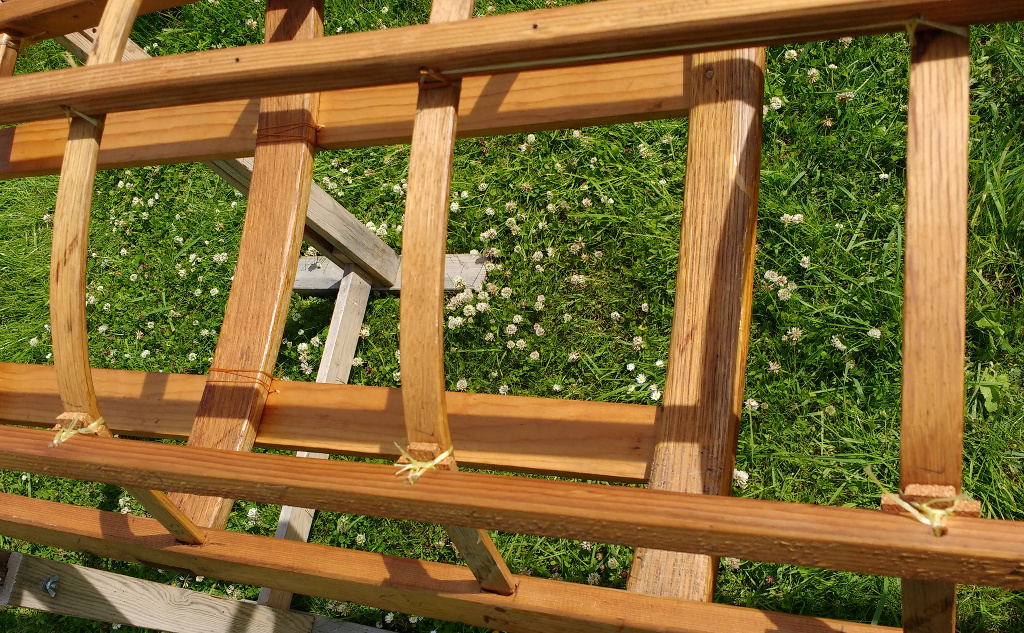
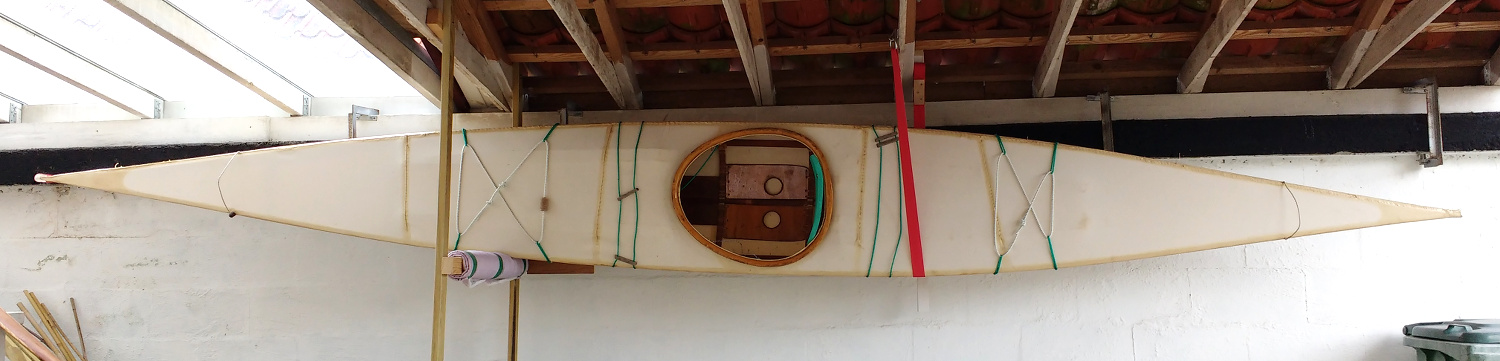
Firstly, I sliced about 12 mm off each end of most of the ribs, making adjustments to ensure that they give a smooth profile when forced back into the holes, which they did under protest because of the changed angle of entry to the mortices in the gunwales.
The chines have a limited range of position on the ribs, otherwise the rib will touch the skin. So I put the chines as far apart as possible and also pushed them away from the ribs with cross shaped pieces of cork, 5 mm thick, lashed to prevent them escaping. This is equivalent to changing the chine dimension from 20 x 20 mm to 25 x 20, which would have been a good idea originally because it allows freer placing of the chines to adjust the primary/secondary stability balance.
To save weight, I left off the centre beams which connected bow to cockpit and cockpit to stern. This made the decks flatter both fore and aft, which provides a more secure bed for fastening down the paddle as an outrigger to aid entering and exiting.
Here is the finished frame. Note the hinged plate footrest. It can be pulled up with strings to allow goods and airbags to be pulled deep into the bow by a cord running over a pulley on the bow post. There is another pulley and cord loop to allow dragging stuff into the very confined space under the back deck.
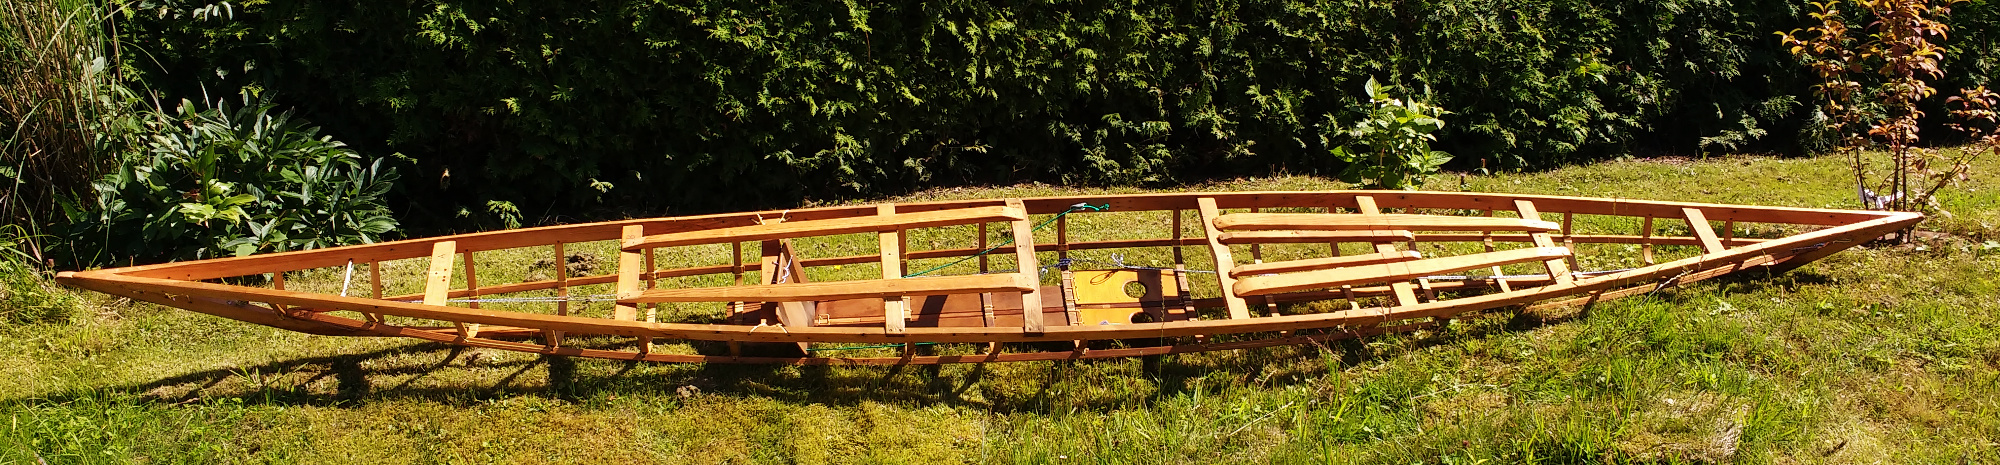
Now I can fasten the paddle as an outrigger in front of the cockpit. It is much easier to use than sitting on a paddle behind the cockpit.
Now for the skin. Because there is no centre beam, and because of sewing difficulties described later, I adopted Christopher Cunningham’s (Building the Greenland Kayak) method of first stapling the stretched skin to one gunwale, then sewing the seam along the gunwale.
For the skin, I changed from the original nylon to a tightly woven heavy cotton duck, 600 g/m^2 (= 20 ounce). This proved really difficult to handle. It was difficult to get a needle through, even with the sailmakers palm to drive the needle in and pliers to pull it through. I was averaging 30 seconds per stitch, through three layers of cloth. The cotton cloth is completely inelastic, so it forced pleats on the deck and stitching at bow and stern. It also demands a convex form everywhere, any concavity causes the cotton to lift away from the frame, however much tension one applies. Since my original kayak had a built in skeg under the nylon skin, I had to saw this off to make a very slightly convex keel line, shown below before mounting the protective beech strips.

To sew the pleats flat without any hard structure below, and without access beneath the deck, I had to drill holes through the three layers before using a semicircular bent needle. To locate the needle tip under the deck I used a powerful LED lamp in the hull to cast a shadow of the needle tip. This only works in a shady place.

In the end I needed four pleats on the deck. The pleats are marked by stripes of varnish, to waterproof the drill holes. The main line of sewing is on the upper gunwale.
Since I was working alone, the sewn skin was a bit baggy, so I sprayed it with water and passed a hot dry iron over it to shrink the cotton. This worked amazingly well. Just using a steam iron was not so effective.
For waterproofing the hull I used an unusual, but logical, formula from Claeys and Hugenin (Construire et utiliser les Kayaks de l’Arctique). The first two coats were by weight 10 parts of talc, 10 mineral turpentine, 10 raw linseed oil, 100 commercial varnish, in this case Hempel’s ‘Classic’ varnish, which appears to be a mix of linseed and tung oil with added siccative and various solvents to improve levelling. The talc is first mixed with a spatula into a portion of the linseed oil to ‘wet’ it, before dispersing into the main mix. The purpose of the talc, which is a silicate mineral with a plate like crystal structure, is to fill in the pores of the cloth to help make it waterproof, the mineral turpentine is to thin the mix to aid penetration and the extra linseed oil is to plasticise the varnish, which is really intended for wood surfaces. A further two coats were the undiluted oil varnish. The keel, chines and sewing lines were given extra coats of varnish.
The deck treatment is just a silicone water repellent (Hempel’s fabric protection) to give a water repellent rather than a watertight finish. The cotton cloth tightens up when it gets wet, which makes it effectively waterproof. My Klepper folding kayak uses the same principle, which gives a nice sweat-free interior.
The stitching of the bow and stern joins needs extra care in waterproofing. I used sikaflex polyurethane sealant (there are many product numbers, I used number 11, don’t know why), which hardens by reaction with water vapour. After that, bent beech wood strips were screwed through to the frame to give protection as well as to cover the messy sewing plus sicaflex.
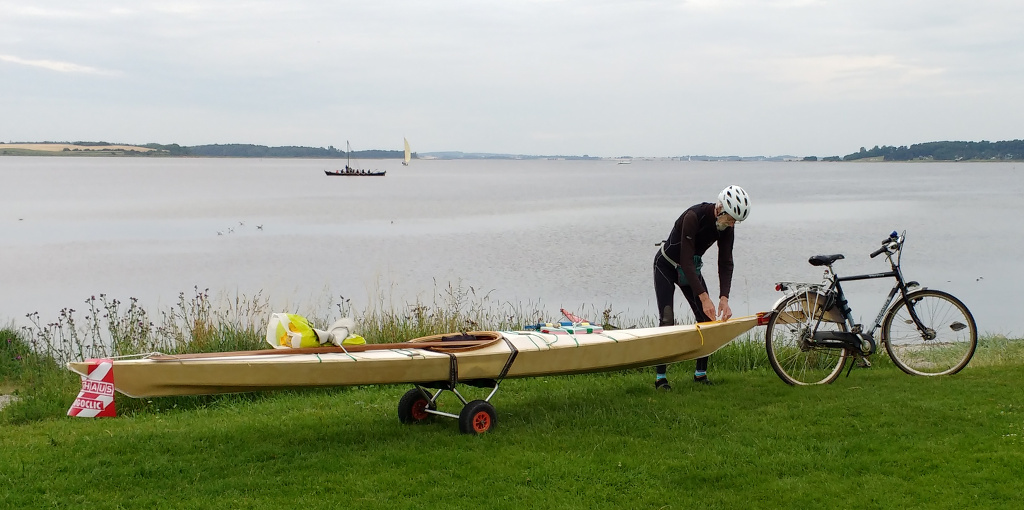
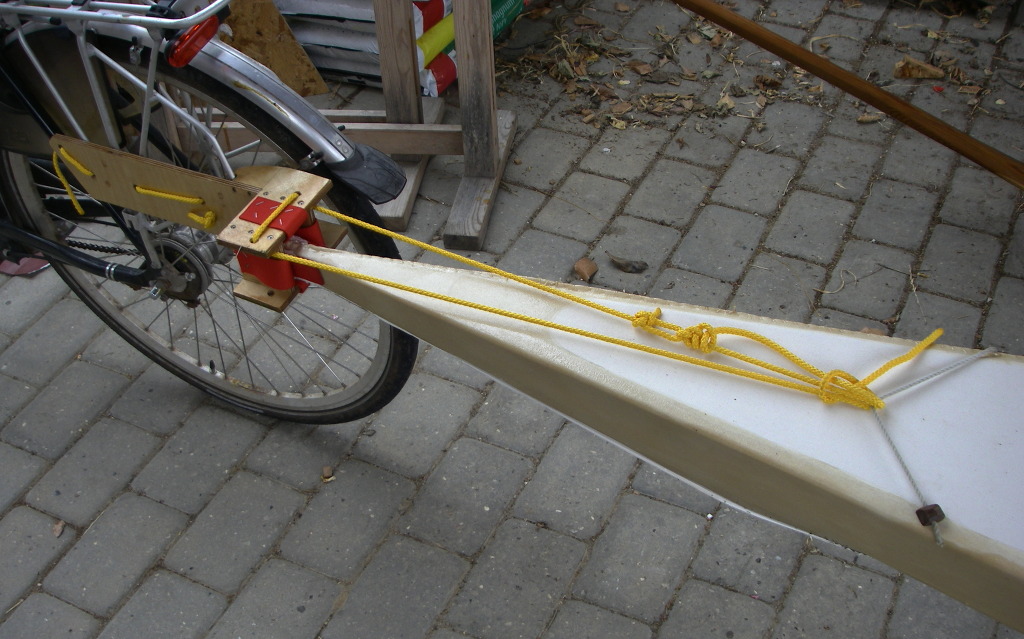
The bow was further protected by tough nylon woven strapping in a form which fits into a recess on the towing system fitted to my bicycle for the 400 m journey to Roskilde fjord.
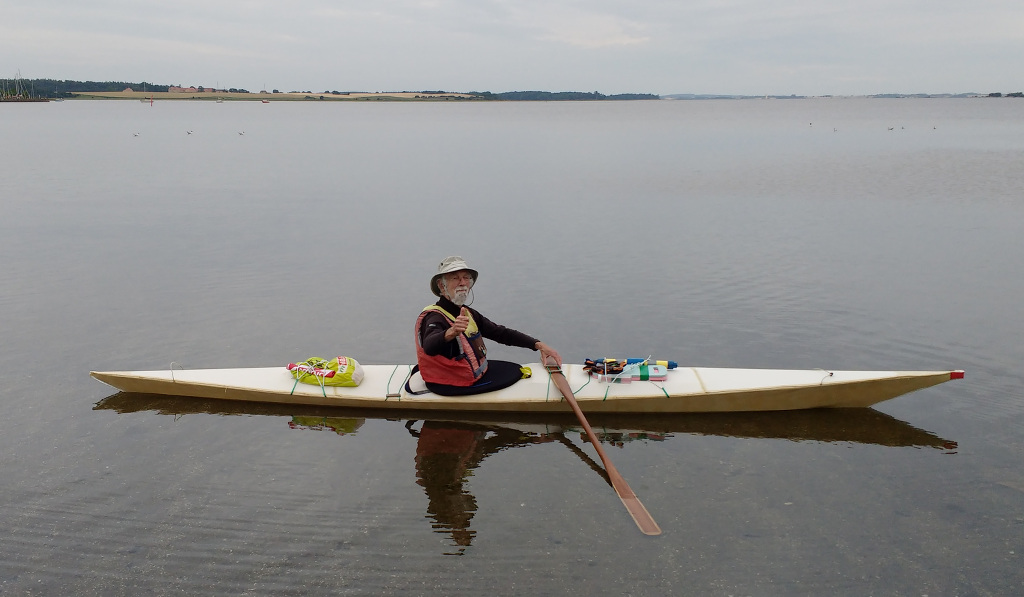
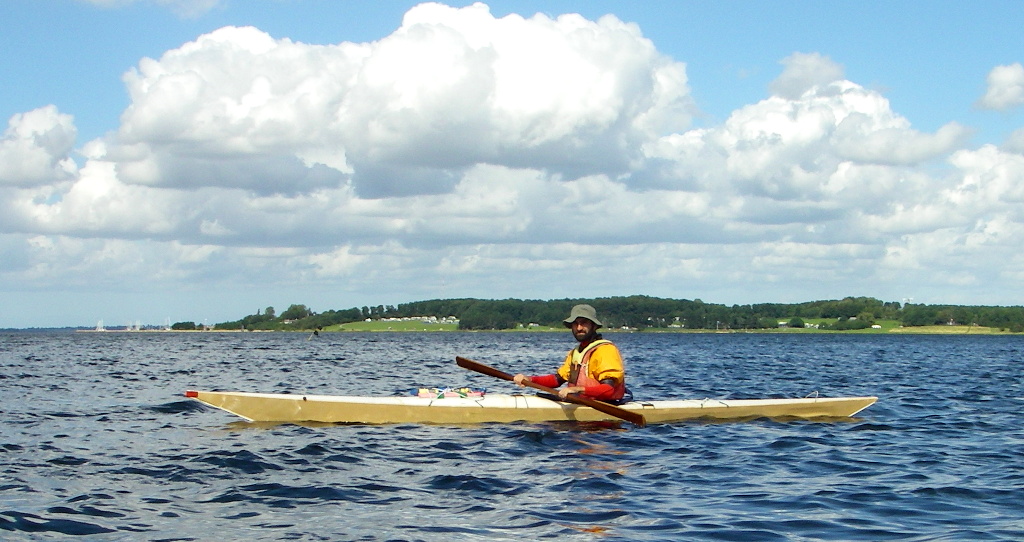
The result of this effort, particularly with the heavy cotton cladding, is a boat that paddles well and straight and is stable enough that I can eat a sandwich without having to deploy the paddle float. Spreading the chines and shortening the ribs greatly improved the primary stability. The bow looks ridiculously sharp. It adds weight and wind resistance, and is unnecessary because I don’t intend to paddle among the ice slabs that occasionally form in the fjord. The cotton skin will not stretch even over this long bow section so a sewn seam was needed. The previous nylon skin could stretch over the bow with a seam only needed along the deck ridge, so there was some sense in making an elongate bow.
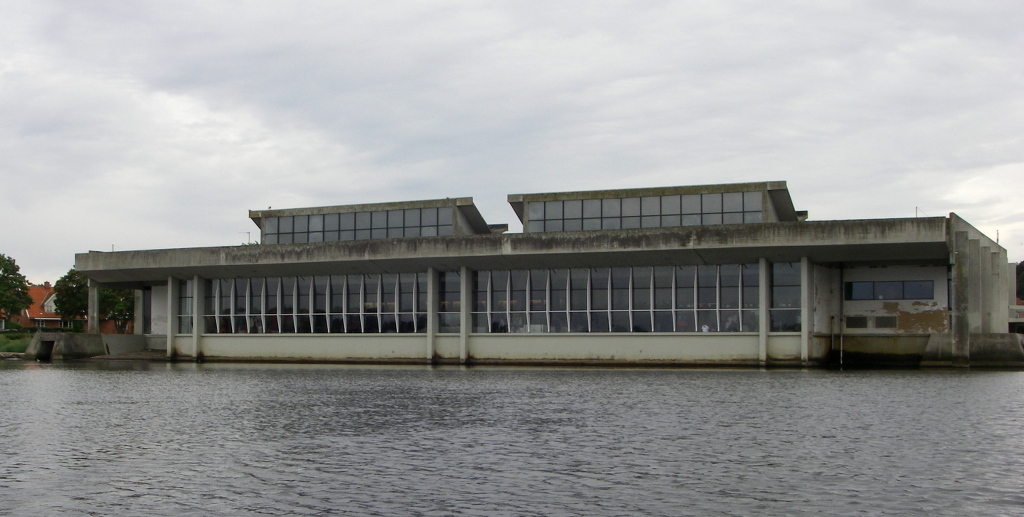
The maiden voyage was around Roskilde harbour, passing first the decaying concrete of the Viking Ship Museum, containing the decayed relics of four Viking age vessels.
Next to the museum is the harbour and workshops devoted to studying and replicating the Viking age technology. Here is a small boat recently fashioned using old fashioned tools by modern people.
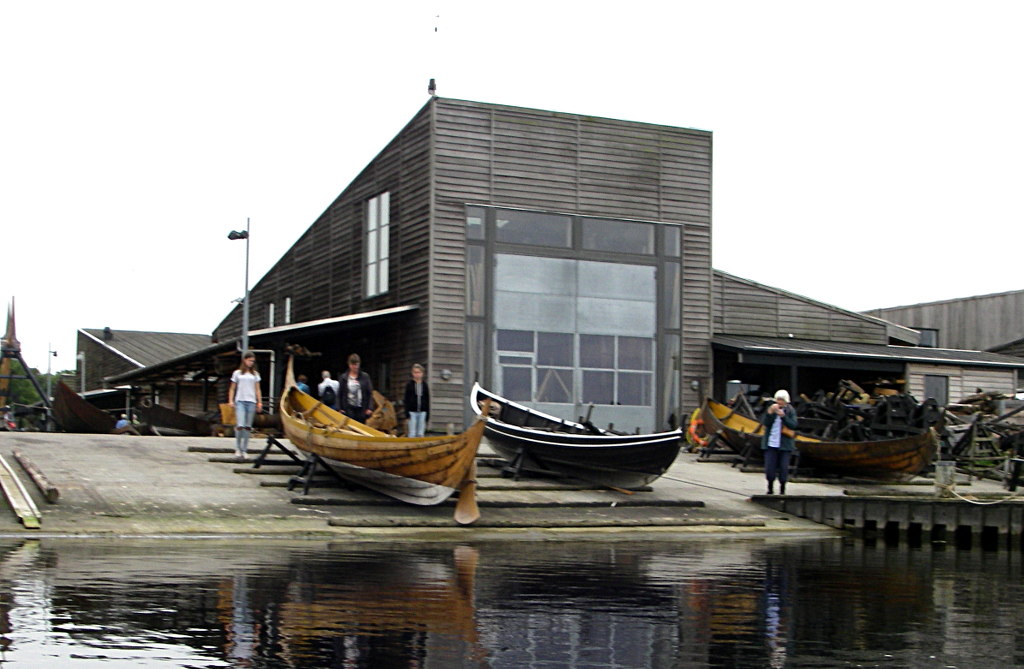
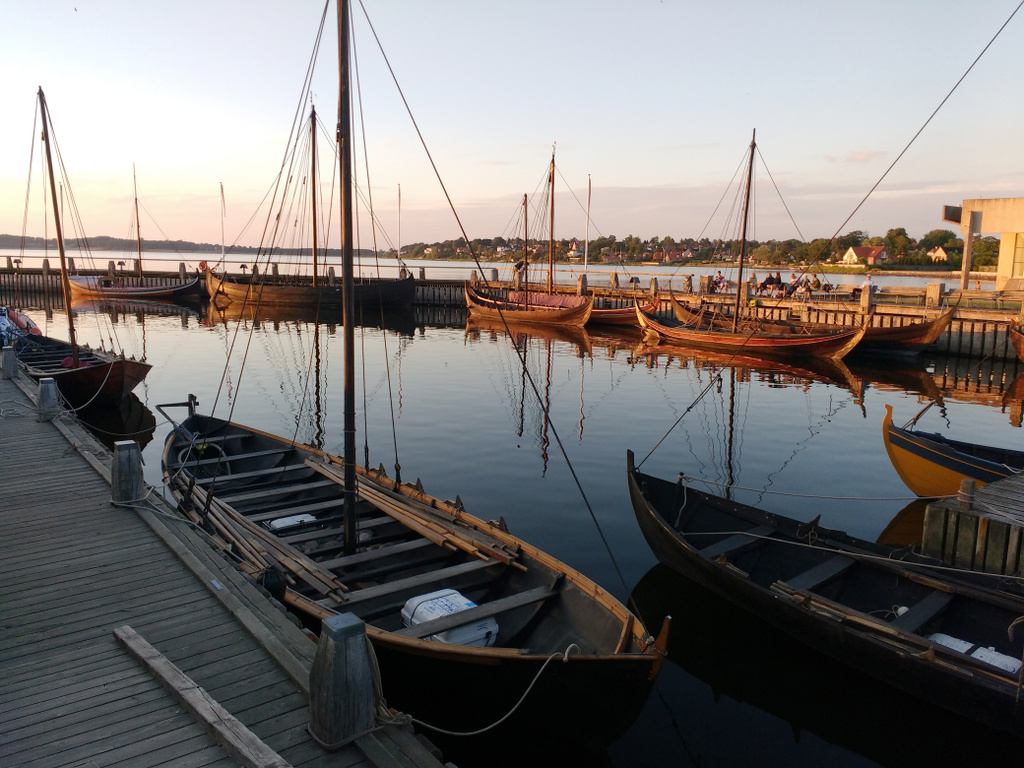
The demonstrations of woodworking technique are the most interesting aspect of the Roskilde Viking revival for the age of tourism. There is now a whole fleet of reproduction boats which take people out on the fjord for a row, or a sail under a square of wool, if there is the right amount of wind.

The linked pdf below gives the dimensions of this kayak, which is suitable for a person 60 – 70 kg with slim thighs, because the cockpit rim sits fairly flat so there is not much space to slide in. Even so, the bow rides a bit high, so maybe the masik needs raising to tilt up the cockpit rim, then the bow ribs can be made shorter. The boat is heavier than I intended, about 19 kg. Next time, I will return to a nylon skin and make lightly loaded frame pieces from Western Red Cedar, and shorten the boat while keeping the present waterline.
Tim, August 2017
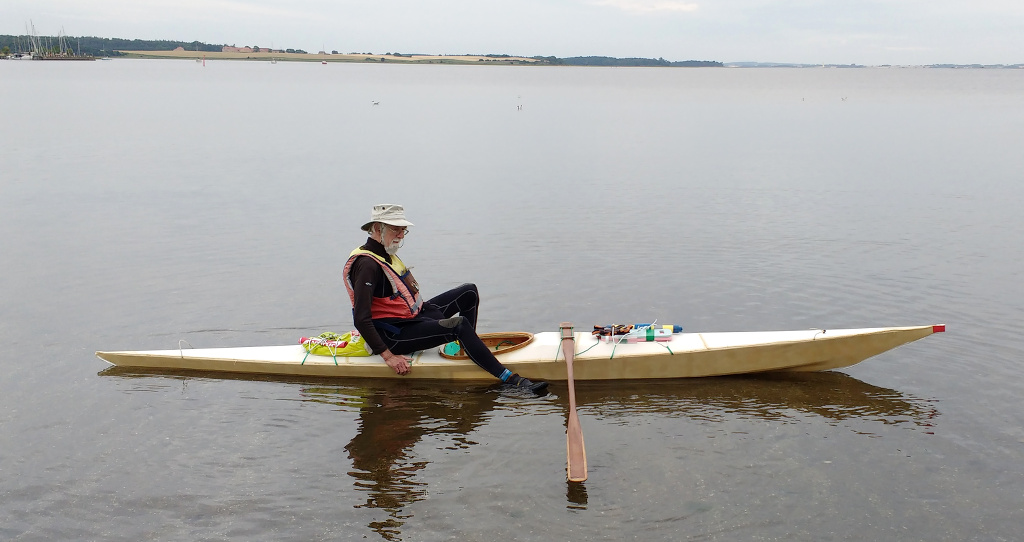
A few days later I invited an experienced paddler to test my boat, while I paddled my Klepper folder.
There are two alternate design principles for skin on frame kayaks. The Klepper has five plywood frames holding the longitudinal pieces, My Greenland style boat has 15 thin springy oak ribs doing the same job. The ribs only weigh one kilo altogether, so compare favourably with the fewer, but more massive frame pieces of the Klepper. The 6 mm thick oak strips are, however, tricky to heat bend to the exact curve needed at each point.
Yannis, my reviewer, has the same weight and build as me. The calm water profile shown below seems about right, as a compromise between freeboard to keep dry and side wind sensitivity, and ease of rolling.
In the background is Roskilde’s campsite “Vigen”, where one can rent a plastic kayak. That is a sensible choice for the shallow fjord with many stones lurking a few millimetres below the surface. Fortunately they are mostly glacier rounded lumps which bump rather than cut.
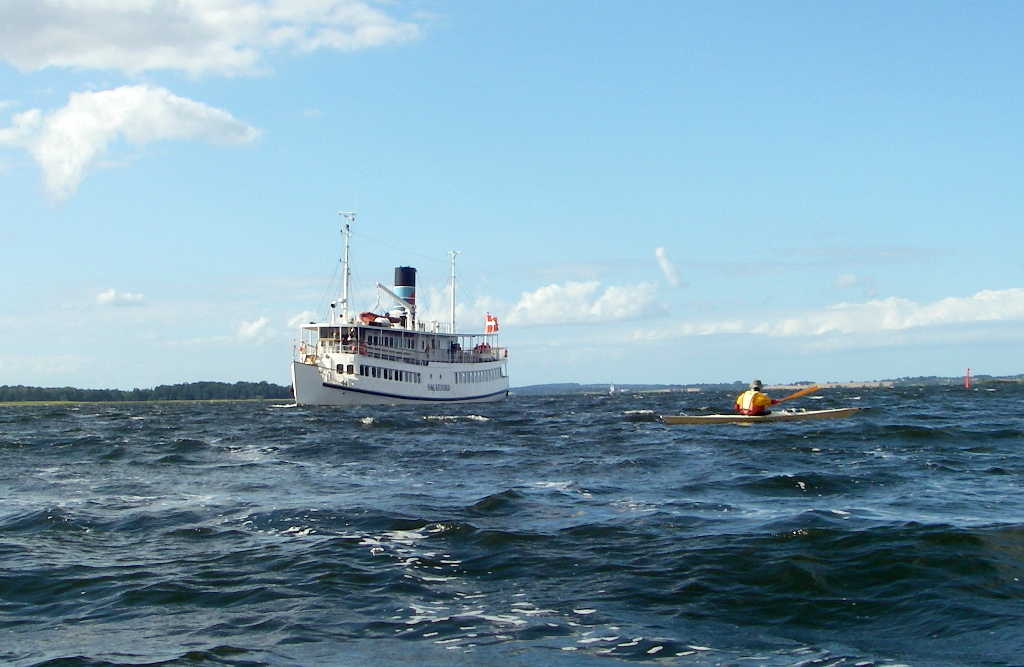
The cross wind performance was tested in the 15 m/s blast down the long north west fetch of the fjord. There was some scum forming on the steep chop but the boat steered easily, and was quick enough to avoid the only sizeable boat which plies the fjord – The “Sagafjord” travelling restaurant.
It was a successful sea trial in most respects, except for the litre of water that entered the boat during the 8 km voyage. Now I will have to tip the boat into a water bath to find the leak. I suspect the sewing line at the bow or stern, or both, since the waves were not high enough to break often over the deck, which is not waterproof.
Tim, August 2017